sexta-feira, 9 de novembro de 2012

A construção - The Building (IV)

Hoje vamos falar sobre o piso...
Today we're talking about the floor...

Encontrei pouquíssimas fotos de interior de lojas daquela época. Então, nesta parte toda vou usar uma mistura de bom-senso (baseado nas fotos e pesquisas que fiz) e "liberdade criativa", ou 'imaginação' pura e simples, hehe... 
Visual reference of stores interiors from that time were awfully scarce. So, for the inside of the store I'll use a mixture of common sense (an educated guess based on all the research I made) and 'creative freedom', or pure and simple 'imagination', lol...


Interior de uma loja de tecidos no final do século 19.
Inside a store, turn of the 19th century.
Todos as construções antigas do século 19 que me lembro de ter visitado tinham dois tipos de piso: tábua corrida, do tipo longo e escuro, ou então mármore. Apesar da minha loja ter uma certa elegância decorrente da influência francesa - considerada 'chique' na época - não é classe AA. Para ser, teria que ter vários andares, e até elevadores! Então, optei pelo piso de tábua corrida, pois acho bem elegante e bonito.
All buildings from the 19th century that I have been to had one of the two kinds of flooring: wood planks (the long and dark kind) or marble. Even though my store must have a certain degree of sophistication, due to its French influence - the reference for elegance back then - it's not exactly the elite kind. To be that, it would have to have more than one floor, and even maybe elevators! So, wood planks it is, and I kind of like it better too.

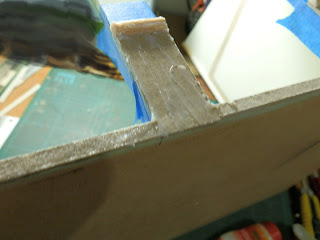
A estrutura, depois de 3 anos 'largada', estava cheia de pó e suja. Refiz a pintura toda por dentro e cortei uma placa de papelão paraná seguindo o contorno interno.
The store structure, after 3 years 'abandoned' on a shelf, was covered in dust and really dirty. I cleaned and repainted it inside. Then I cut a piece of solid cardboard following the measures of the floor inside.


eca!
eeww!
limpinho é melhor... :)
fresh and clean is better... :)
Pintei o papelão num tom marrom escuro, pois se ficarem falhas entre as 'tábuas', não vai aparecer tanto. E cortei várias tiras de uma madeira bem fina, que o Angelo Pinheiro já tinha comprado para mim na rua do Gasômetro, em SP, desde aquela época. Cada tira tem cerca de 12 mm de largura, ou 14 cm no tamanho real, e o comprimento de 15cm ou cerca de 1,80m na escala real. Creio ser um tamanho adequado de tábua para piso da época.
I painted this cardboard with dark brown so that if the 'planks' didn't fit perfectly (they rarely do, lol), that wouldn't show too much. And I cut several strips of a dark veneer wood my 'old' teacher, Angelo Pinheiro had bought for me at a specialized store in Sao Paulo, way back then (2009). Each strip was about 3/8" x 6", quite reasonable, I believe.


Comecei pelas beiradas, fazendo o contorno todo. Os cantos foram esquadrejados (cortados em ângulo de 45º), como em molduras. Aí fazer o 'miolo' foi fácil. Foi mais um trabalho de paciência do que de habilidade... Alternei as distâncias cortando algumas tiras de madeira pela metade, como seria a disposição normal. 
I started working the edges, making a kind of  mitered frame for the floor. The 'core' was much easier. It was more a work of patience than skill... I alternated the lengths by cutting some strips/planks in half lengthwise.


Depois lixei bem, até ficar bem lisinho. Queria um brilho suave, pois na época não existia sinteco!!! Comecei usando cera de abelha. Esfreguei bem e depois lixei. Dá trabalho e gastei várias tiras de lixa, pois o excesso de cera que sai vai ficando todo na lixa... Ficou legal, mas eu queria um pouco mais de brilho (não muito).
After finished and dry, I sanded over and over until it was very smooth. I wanted my floor to have a very soft shine to it, but not too much, as back then Synteko hadn't been invented yet!!! I started by rubbing bee's wax. Then sanded again. There's a lot of work and effort to it, as the excess wax sticks to the sandpaper and I had to keep changing it again and again... I liked the result, but I wanted a little bit more shine to it.


esse 'treco' é a cera de abelha
This 'thing' is bee's wax
o lado esquerdo não tem nada, para comparar.
the left side has no wax, just for comparison reasons.
a lixa e o piso lixado (só no lado direito)
the sandpaper after use and, again, only right side has been worked on.
todo o piso já 'encerado' e lixado.
All done!
 Aí lembrei que na época já existia acabamento com Goma Laca. É um produto natural e diluido em álcool e que dá muito brilho. Passei uma camada de laca incolor, deixei secar bem e passei bom-bril. Sim, isso mesmo! Bom-bril!!! Dá brilho, rsrs... Gostei do resultado, e você? :)
Then I remembered that back then they already used Shellac. It's a natural alcohol based product. I applied one single coat of a more modern colorless version of it and, when dry, worked on it with steel wool. That's correct, the kind we use in the kitchen! It's great for shellac, lol... I liked the way it turned out, and you? :)


Piso já com a goma laca e testando rodapé e rodateto (comprados). Não gostei do rodapé, muito alto....
The floor finished with Shellac and dry fitting the footer and ceiling moulding. I didn't care for the large footer, though...

O rodapé mais estreito faz a loja parece maior, não? :)
The narrow footer (actually a chair railing) makes the store look bigger, doesn't it? :)
Obrigada! Thank you!
.

segunda-feira, 5 de novembro de 2012

A construção - The Building (III)

Enfim... a fachada!!! :)
Finally, the facade!!! :)

Você lembra os elementos que eu queria usar na fachada? Não? Veja-os marcados na foto abaixo. Não estou reproduzindo uma loja específica, então busquei reproduzir os elementos que notei serem mais comuns na época.
Do you remember the elements I wanted to reproduce on the facade? No? Well, you can refresh you memory with the picture below. :) Keep in mind I'm not trying to reproduce in miniature one specific store. Instead, I'll try to reproduce some recurring elements of that time that I noticed when I was doing my research.


Bem, comecei por baixo... Notei que as lojas da época tinham uma espécie de 'faixa', com uns 80 cm de altura + ou -, texturizada e geralmente com terminação arredondada. Acho que para proteger a pintura de marcas feitas por pés, quando os homens apoiavam na parede? Bem, para isso, colei um pedaço de papelão paraná sobre o outro, para obter uma espessura de uns 3 mm. Cortei nas mesmas medidas das larguras entre as portas. 
Well, I started from the bottom. I noticed that stores back then had a kind of 'band', around 2 1/2 feet tall, with a texture and usually ending in a rounded finish. I think it was meant to protect the painting from the feet, as men used to rest their feet on the wall while leaning against it?... Anyway, I glued two layers of thick solid cardboard to get a thickness of about 1/8". Then I cut in widths that matched the ones between the doors.


Eu já tinha comprado há algum tempo varetas em semi-círculo na loja do John Constable (Canadá). Cortei nas mesmas larguras e colei, mantendo bem preso até a cola secar. Colei cada conjunto no seu lugar, mantendo preso com prendedores, para não soltar nadinha.
I had bought some time ago some some half dowels from John Constable (Canada). I cut pieces with the same length as the width of the cardboard pieces. I glued them on top, securing with clamps. Then I glued each to the right place on the facade, again securing with clamps until glue was set.


Agora era a hora de aplicar textura... Protegi bem toda a área em volta com fita própria para pintura, da 3M. Usei textura criativa, da Acrilex. A que eu tinha era transparente, o que não importa muito pois pintarei depois. Mas esse material é ótimo para imitar granito, por exemplo, e vem em várias texturas! Depois que seca fica duro como pedra!!! Espalhei uma quantidade generosa, e dei batidinhas com pincel de pintar estêncil para dar a textura que eu queria. Tem que trabalhar pequenas áreas por vez, e rápido, pois seca logo!
Now it was time to apply the texture... I protected well all around with masking tape. I used a product called textura criativa, by Acrilex, a national brand. The one I had is transparent, but that's irrelevant as I was going to paint it later. This material is great to create granite too (in one of the other colors offered). It dries as hard as stone!!! I spread a thick layer, tapped with stencil brush to create the texture. I had to work small areas at a time, as this material dries very fast!...


Depois de seco, pintei. Mas ficou muito mais escuro do que eu queria, então depois pintei de novo, num tom mais claro.
After well dry, I painted them. But I thought it was way too dark. I painted it again with a lighter shade later.


Cortei os arcos em papelão paraná, usando os próprios arcos das portas (vãos) como referência. Coloquei o papelão por trás e tracei com um lápis. Como os arcos da fachada foram cortados manualmente, não dá para garantir que ficaram todos os arcos iguais, então tracei e marquei cada um individualmente. 
Next I cut the ornaments around the arches. I used the solid cardboard again. I used the arches themselves to trace the ones I'd cut on paper. The ones on the building had been cut manually, so I could not be sure they were exactly the same shape and size. So I traced and marked each one individually (to remember which was which later).


Cortei um pedacinho para fazer de detalhe. Cometi o erro de colar antes de colar o arco em si. Alguns ficaram descentralizados, o que me deu trabalho depois, pois tive que 'acertar' com pasta de modelar. Deixe para colar depois do arco já no lugar. Cortei também as tiras retas das laterais. 
I also cut some small pieces to make the top ornament. I made a mistake here: I glued them on the paper arches before gluing the arches on the wall. Oh-oh, they ended up being off center. I corrected that using modeling paste, but I strongly recommend you not to do the same... :) I also cut the straight strips to go on each side.


Já aproveitei e 'tirei o molde' para cortar o relevo que vai do lado de dentro, mas em um papel mais fino (1mm de espessura).
I also traced the details that will go inside, on a thinner paper (1/16").


Para as 'molduras' do alto da fachada, encomendei umas prontas na miniatures.com. Essas molduras geralmente eram instaladas aos pares, paralelas. Uma bem no alto e outra mais embaixo. E, não sei porque, a de baixo costumava ser maior.... Cortei uma tira de balsa e arredondei para acrescentar à moldura pronta. 
For the mouldings on top of the facade, I ordered some crown mouldings from miniatures.com. Those usually came in pairs back then, one on top and the other one a little bit lower. I don't know why the lower one was usually bigger... but I cut a strip of balsa wood, rounded one of the corners and glued it to one of the crown moldings to get that same effect.


Testei (quase) todos os elementos no seu devido lugar, antes de colar. Cortei também os retângulos que vão nas laterais. Fiz a conta do espaço disponível para saber quantos cortar e qual o tamanho. 
I dry fitted (almost) all elements before painting and gluing. It doesn't show on the picture, but I also cut some rectangles to go on each side. Some math was involved to figure the exact number of rectangles that would fit the available space and the space between them...


Pintei todos os elementos decorativos da fachada em um tom marfim e colei no lugar. Gosto de usar uma cola que comprei lá fora, a Ultimate Crafter's Choice. Parece com nossa cola branca, mas é muito mais espessa e forte. Seca rápido e depois não solta por nada!!! Muito boa para elementos da construção em si. 
I painted all elements before gluing, using the seashell white by Ceramcoat. To glue building elements, I like to use the Ultimate Crafter's Choice. Very strong and reliable!

Bem, a fachada ficou assim: 
Well, this is what it looked like in the end:


Ainda falta arrumar os arcos internos (note onde o mdf aparece), mas vou fazer isso quando trabalhar nas portas. E também colocar os números, a placa com o nome da loja, a propaganda na lateral e umas urnas no alto, mas vou deixar para fazer tudo isso por último, porque até lá ainda vou ficar virando a estrutura de um lado para o outro, e não quero estragar nem sujar esses detalhes, rsrs...
I still have to work on the inner part of the arches/doors (notice the spots where the mdf shows?), but I'll work on that part when I make the doors. I also still have to place the numbers, the store name, the ad on the side and some urns on top. But I'll do all that at the very end, as I still have a lot to do inside and I'll probably turn the whole building all around a lot, and I don't want to damage those elements...

sexta-feira, 2 de novembro de 2012

A construção - The Building (II)

A outra parede...
The other side wall now...

Para o outro lado da loja, eu queria um visual mais 'destruído'. Como se uma construção vizinha, que tivesse compartilhado a parede, tivesse sido demolida e ainda nada tivesse sido reconstruído no lugar. A virada do século foi um momento de muitas transformações na cidade, com muitas demolições e construções acontecendo o tempo todo. Como na foto abaixo...
For the other side of the building, I wanted a 'worn down' look. As if there had been a building there, which shared the wall, but that had been torn down and no other one has been built there, yet... The turn of the 19th to the 20th century was very feverish in terms of building, with many demolitions and new buildings happening all over the city (São Paulo is where my fictitious store is located). Just like in the picture below...


Esta técnica que usei poderia ser melhor realizada com DAS, um tipo de massa importada que tem a mesma aparência de tijolo. Mas como é difícil de encontrar, usei biscuit mesmo. Afinal, eu só queria alguns tijolos expostos. O restante seria coberto pelo 'reboco'. Poderia nem ter feito toda a parede de 'tijolos, só a parte aparente. Mas a impressão dos tijolos sob o reboco dá mais realismo, como aprendi com a Otterine/Brae.
I could have used DAS, a kind of paper clay, that already comes in a terracotta color. It makes wonderful bricks! But as it's hard to find here, I went with cold porcelain, much cheaper and easily found. After all, there would be only a few bricks exposed. The rest would be covered by the 'plaster'. Yes, I could have made just a few 'patches' here and there, but as I learned from Otterine/Brae, it looks more realistic if you do it all.

Primeiro passo: abrir a massa. Como eu não fazia questão de uniformidade, abri de qualquer jeito. Mas o certo é abrir entre guias de espessura, para ficar uniforme (se quiser um resultado mais caprichado...)
First step: open the 'dough'. As I didn't care for a uniform thickness, I opened without any guiding. But the correct way to do this to get an even result is by using "thickness rulers'...


o jeito 'certo' de abrir a massa...
the 'right' way of working the porcelain...
Passei cola na 'parede' e fui colando o biscuit. Passei a cola à medida em que abria, para não secar.
I spread glue on the 'wall' and placed the cold porcelain. I would spread glue as I had whole flat pieces to place, or it would dry too soon.


Agora foi a hora de marcar os tijolos. Usei um rolo marcador que se compra em lojas de artesanato. Mas o meu estava soltando - não verifiquei isso antes - e não daria tempo de colar e consertar, senão secaria o biscuit. Então tive dificuldade de controlar a pressão. Tudo bem no meu caso, pois a maior parte ficaria coberta. Verifique antes e faça testes!!! 
Now it was time to score the bricks. I used a scoring roll easily found here at crafts stores. But mine was kinda loose, and I neglected to check it before I started. Too late, I couldn't afford to glue and fix it now, so I went on anyway. It was really hard to control the pressure, and it will show later. No problem, only parts will be exposed, so I didn't worry. But remember: test all your tools before you start!!!


procure fazer as linhas coincidirem. 
Try to make the lines match.
biscuit natural parece branco quando ainda úmido.
natural cold porcelain looks white while still 'moist'.
mas ao secar fica quase transparente! Veja as marcas do rolo  causadas pela dificuldade em controlá-lo!
but it dries almost transparent! Now you can see the roll marks, caused by the wobbling!...
Era um dia bem quente e seco, e o biscuit estava secando rápido demais. Passei uma pincelada de água por cima para evitar isso. Quando fui passar o rolo, criou uma 'textura' extra, pois colava no marcador. Até que gostei, pois daria mais realismo ao aspecto "detonado" que eu queria... Aí foi só deixar secar.
That was a very hot and dry day, and so the cold porcelain tended to dry way too fast. To give me some more working time, I sprinkled some water on it. When I rolled the brick thing, it created an extra 'texture' I hadn't planned, as the water made the cold porcelain stick to the tool. I actually liked it, as it would make it even more like the adjacent wall had been 'torn down'. I let it dry overnight.

Depois de seco, foi a hora de pintar. Usei o mesmo preparado cor de 'cimento' qut tinha feito para o outro lado (guardei em um frasco bem fechado). Fiz uma tinta mais parecida com o tom base do EVA que usei do outro lado para pintar o tijolo. 
Once dry, it was time to paint the bricks. I used the same color I prepared for the 'mortar' on the other side wall (I had saved it). I also prepared some paint to 'match' the base EVA (foam sheet) color I used on the other side, to paint the 'bricks'.


Agora foi a vez de passar o 'reboco': usei gesso acrílico e misturei tinta até atingir o tom da de verde que usei na fachada. Espalhei uma camada bem grossa, com uma espátula, deixando 'brechas' onde queria que aparecesse o tijolo, como se um piso ou muro tivesse existido ali, ou simplesmente foi 'descascado' durante a demolição.
Next, time to 'plaster' the wall: I prepared a mix of 'acrylic plaster', used by painters, and mixed the same green paint I used on the facade. I spread a thick layer, with the help of a spatula, leaving the painted areas uncovered, so that the 'bricks' would show. I wanted it to look like some adjacent walls or ceilings had been there before or as if the plaster had been carelessly removed during the demolition.


Depois de seco, este acabamento rachou. Acho que foi a mistura de tintas, tinha algumas diferentes. Passei de novo, e alisei de novo. Aí foi a vez de dar um acabamento de "limo" formado pela umidade e chuva... Usei tanto uma tinta bem aguada marrom escura (quase preta) e, novamente, sombra para os olhos. 
I allowed a couple of hours to dry, but when I went there to check, I noticed it cracked all over. I guess the chemicals in the 'plaster' and the paint didn't agree well... I spread another layer, then smoothed it. After it dried, I sanded. Finally, I applied a very dark brown wash to simulate the 'damp patches' caused by rain, and also, again, some eye shadows.


E o resultado ficou assim:
And it looks like this:


detalhe / close-up

Related

Related Posts Plugin Blogger...